The most common technique that is used with brass stencils is to dry emboss them (to use a stylus tool to press the design onto the paper. You can use regular ink pads to color the designs, but I will discuss how to use paintstiks to add color.
Paintstiks are oil colors in a solid paint form (shaped like a crayon). It's non-toxic, fadeproof, permanent, and dries in 24 hours. I will show you how to color the pear using paintstiks.
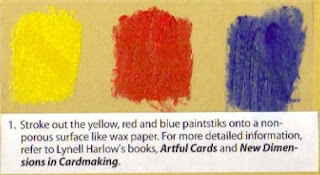
1. Rub the paintstiks (yellow, red, and blue) onto a non-porous surface, like wax paper, as in the picture on above, making a palette to work with.
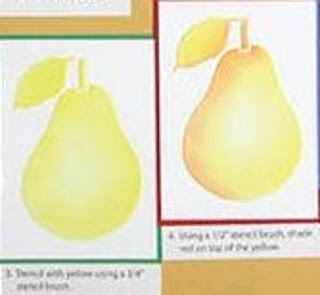
2. Then, using a 3/4" stencil brush, brush the yellow color from your palette and stencil the color on your pear, while the stencil is still in place. See picture on far left.
3. Then, using a 1/2" stencil brush, take some of the red color and shade it on top of the yellow, near the top and on the left side. See the pear on the right side of the picture (it's hard to see, but I think you can see where it is shaded a little darker).
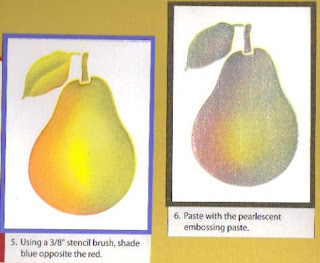
4. Using a 3/8" stencil brush, take some of your blue and shade the right side of your pear (putting the blue on top of the yellow will change the color to green). See picture on the far left.
5. Then, you can leave your pear as it is, or you can add embossing paste on top. The sample on the left uses the pearlescent embossing paste. You could also use translucent embossing paste as well.
6. If you wish to use embossing paste, tape down your stencil with removable tape so that it won't slide.
7. Apply the embossing paste using a palette knife (this knife is nice and flat and is less likely to get paste under the stencil). Apply it as you would apply icing onto cake. When you get a nice even coating, remove the tape from one side of your stencil and gently lift. Removing the tape from only one side will prevent the stencil from slipping. Immediately put the stencil & palette knife in warm water so that the paste will not dry on it. I have found that there is usually some residue that does not come off, but that's ok. You just don't want a lot of paste to dry on it.
So, there you have it. I have shared with you 2 techniques that you can use with your brass stencils. You can use both techniques together, or separately. If you want more ideas and instructions, I would recommend the Dreamweaver DVD called Unique Techniques: Working with Brass Stencils. You can find it in my online store at
https://www.injoystamps.com/index.asp?PageAction=VIEWPROD&ProdID=442 or the book: Dreamweaver New Dimensions in Cardmaking - Using Embossing Pastes with Brass Stencils which can be found at
https://www.injoystamps.com/index.asp?PageAction=VIEWPROD&ProdID=8638.
Dreamweaver makes embossing paste in a variety of colors: glossy blue, glossy red, glossy green, glossy white, matte black, matte orange, matte yellow, copper, gold, silver, as well as the regular matte white and translucent embossing pastes. They really add a nice effect to your cards.
If you want to see more samples using embossing paste, visit my web site at
http://www.injoystamps.com/ and look under Card Gallery and then under Stencils.


